I bought the JIS split keyboard kit sphh jp v2 and accidentally stepped into the custom keyboard rabbit hole, so this post is a record of how I got there and what I think of it so far.
I had been using a Realforce R2 (non-silent, tenkeyless) for everyday work, and before I knew it I had owned it for almost eight years.
Until recently I had no complaints at all, but after I spilled water on it, it started behaving as if the Fn key were stuck down.1
It recovered after a night, but I had no idea when the problem might come back.
That seemed like a good excuse to buy a new keyboard.
At first I considered buying a Realforce R4.
However, recent Realforce models seem to be available only in silent variants, and I was worried that the typing feel would be too different from what I was used to.
That led me to seriously consider building a split keyboard, something I had been curious about for a while.
On the other hand, I lowered the priority of the following points. I do not care that much about them, and there are very few split keyboards with a JIS layout to begin with.
Whether it has F1-F12 keys
Whether it uses a row-staggered layout
I had ChatGPT look for boards that met those requirements and did not appear to be discontinued, and apparently there were only four candidates.
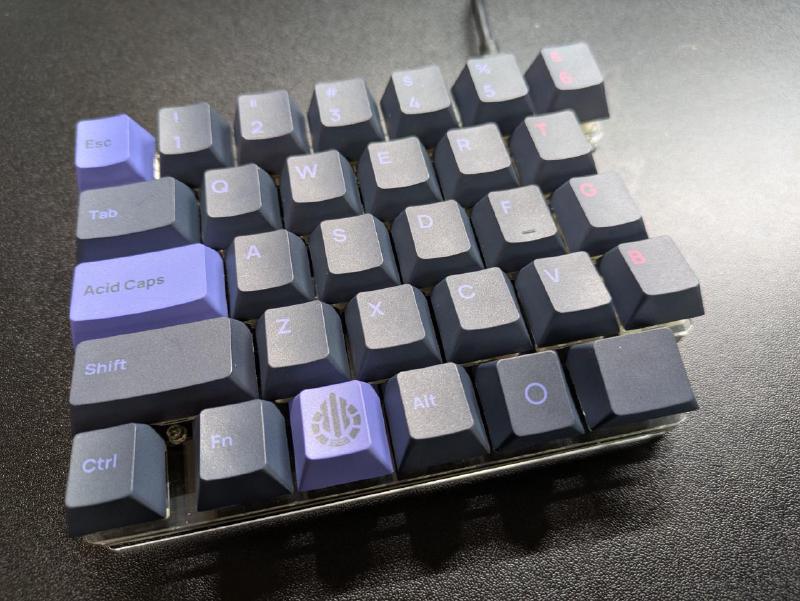
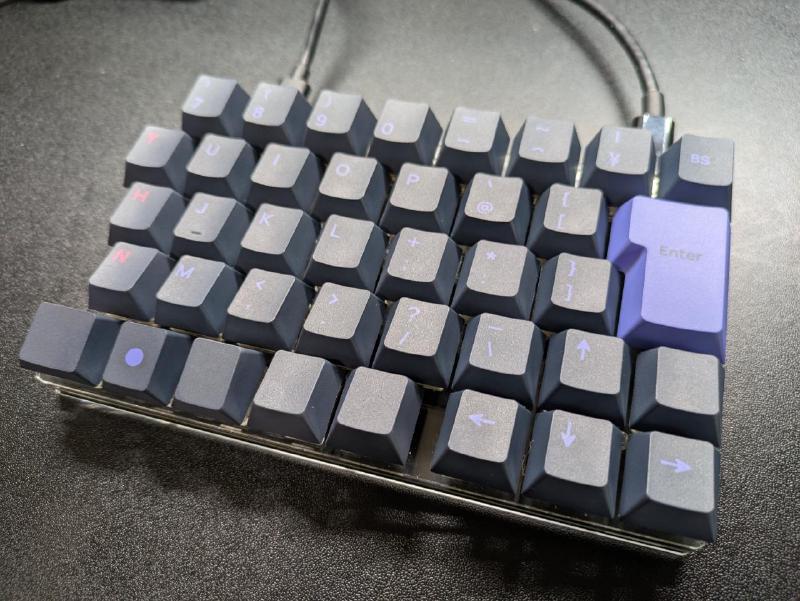
Among them, I chose sphh jp v2, which was in stock when I bought it on 2026-03-15 and seemed simple enough to handle as a first board thanks to its relatively small number of keys and straightforward layout.
I was not confident in my soldering skills, and I did not even own a soldering iron, so I also paid for the assembly service.
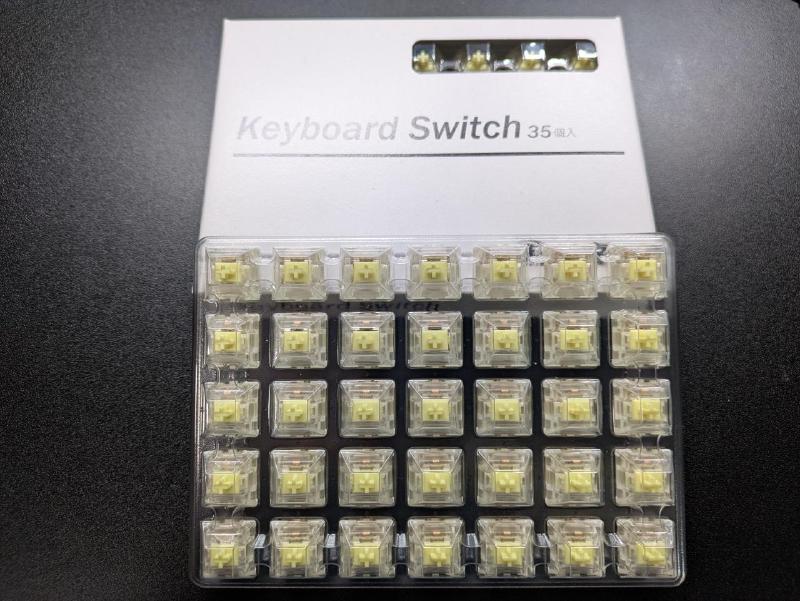
I did not want to choose switches without trying them in person, so I went to Yushakobo in Akihabara and tested several options.
I focused on tactile switches in roughly the 45g-60g range that felt close to my Realforce R2, and among them Gateron Jupiter Switch Banana felt the best, so that is what I bought.
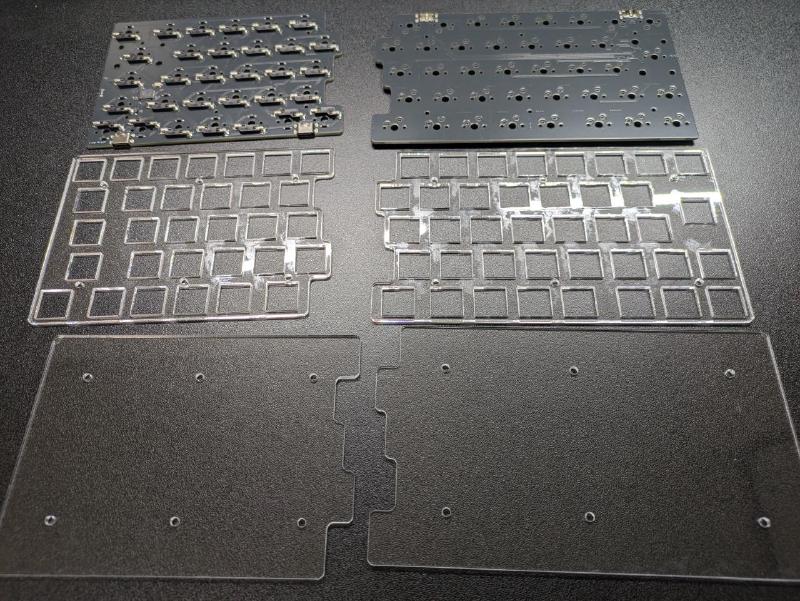
I followed the official sphh jp v2 build guide.
That said, because I used the assembly service, all I had to do myself was everything after “attach the screws and spacers to the top plate.”
I thought the rest would go quickly since the soldering had already been done by a professional, but mounting the switches was more tedious than I expected, and I spent a while going back and forth on the key arrangement, so it still took about two hours in the end.
I had read a few blog posts from earlier builders who struggled during assembly, so I was a little nervous about whether it would actually work, but both halves worked perfectly on the first try.
The total cost of this custom keyboard project came to 43,762 JPY. The breakdown is below.
This total does not include the two USB-C cables I also needed.
Item
Details
Price (JPY)
Board kit
sphh jp v2
16,800
+ assembly service
8,800
+ shipping
198
Switches
Gateron Jupiter Switch Banana (70 pcs)
3,464
+ shipping
500
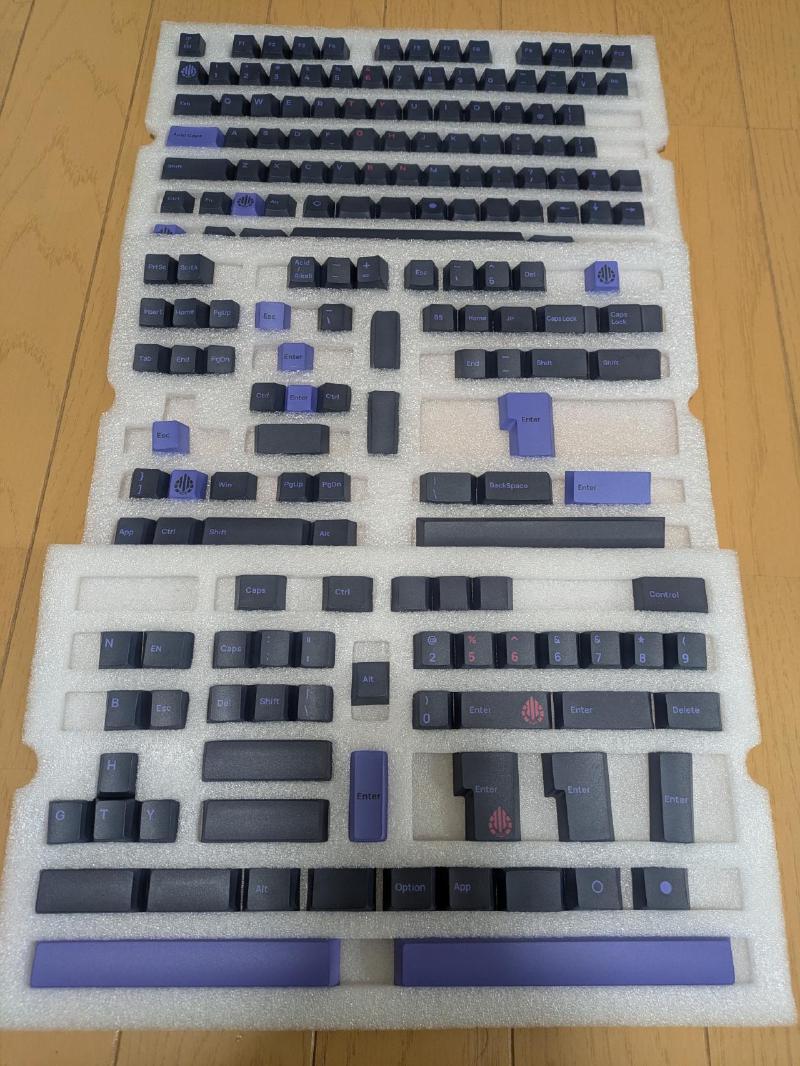
Keycaps
Acid Caps “Standard” Peri on Gray
13,000
+ shipping
1,000
Total
43,762
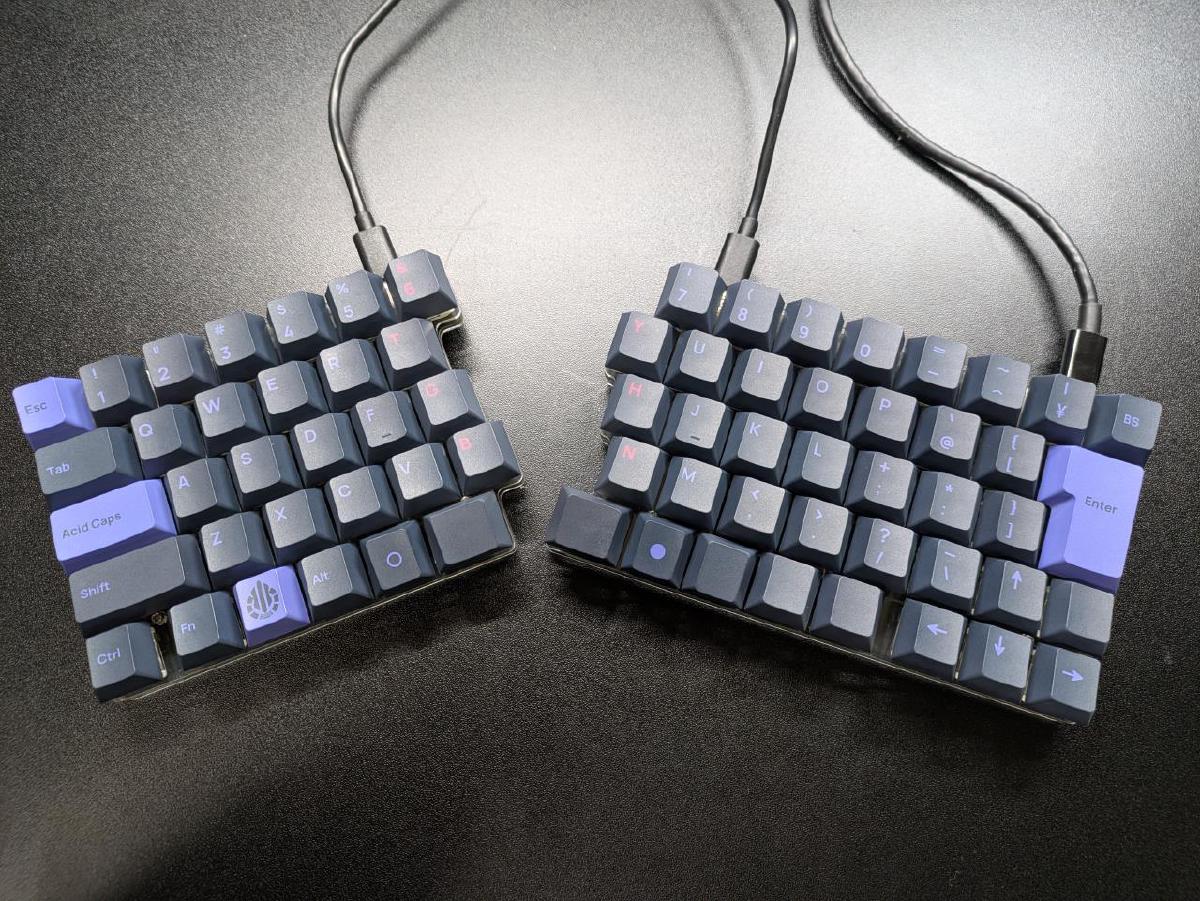
In the end, it cost more than a Realforce R4, but I am happy with it and do not regret it so far.
This was my first split keyboard, so I expected a rough adjustment period, but it turned out to be surprisingly usable from day one.
My typo rate did go up a little, but not enough to be genuinely stressful, and it already felt like something I would get used to soon.
On the other hand, once I started using it, I realized that when typing English I sometimes hit y and h with my left hand.
In words like city and night, I had apparently been using my left hand for ty or gh, but the split layout no longer lets me get away with that.
Since y and h are keys I already hit with my right hand when typing kana, I think I will adjust quickly once I retrain myself.
I am happy with both the typing feel and the appearance.
Spending a bit more on the keycaps made the finished board look much better, and seeing it on my desk is satisfying in a way I did not quite expect.
The typing sound, however, is louder than I had imagined, so I would hesitate to use it full-time in a quiet office.
One of the nice things about custom keyboards is that I can swap the switches freely, so if I get the chance, I would like to try variable-weight switches or experiment with a few other options later.
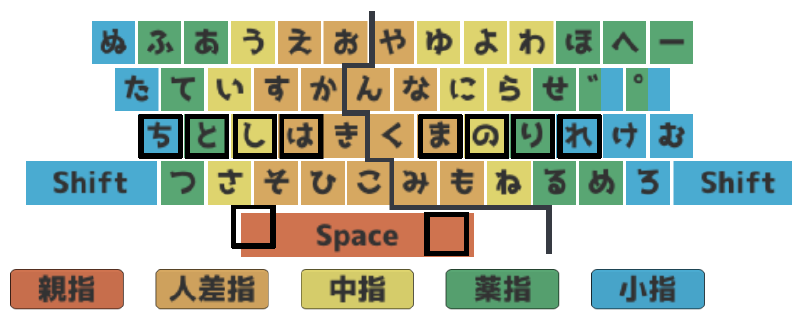
My finger layout is shown below (generated by https://unsi.nonip.net). My pinkies do not cover much territory, and for the voiced mark ゛ and semi-voiced mark ゜ I sometimes use either my ring finger or my pinky.↩︎
The keys around the thumb cluster are intentionally installed upside down. That keeps the keycaps from digging into my thumbs and becoming uncomfortable. ↩︎